Showing posts with label LINQ. Show all posts

Saturday, July 12, 2008

Convert IEnumerable to DataTable in C#

Convert IEnumerable to DataTable in C#

In LINQ, there is no option to casting IEnumerable to DataTable. We need to convert manually. For this, I have created one healper class which convert any type of IEnumerable to DataTable. Use the code below for this kind of requirements.

using System;

using System.Data;

using System.Configuration;

using System.Linq;

using System.Web;

using System.Web.Security;

using System.Web.UI;

using System.Web.UI.HtmlControls;

using System.Web.UI.WebControls;

using System.Web.UI.WebControls.WebParts;

using System.Xml.Linq;

using System.Reflection;


namespace KannanDotNetReference.HelperClasses

{

static public class ConvertDataTable

{

public static DataTable ConvertToDataTable<T>(this System.Collections.Generic.IEnumerable<T> varList, CreateRowDelegate<T> fn)

{

DataTable dataTable = new DataTable();


// Variable for column names.

PropertyInfo[] tableColumns = null;


// To check whether more than one elements there in varList.

foreach (T rec in varList)

{

// Use reflection to get column names, to create table.

if (tableColumns == null)

{

tableColumns = ((Type)rec.GetType()).GetProperties();

foreach (PropertyInfo pi in tableColumns)

{

Type columnType = pi.PropertyType;

if ((columnType.IsGenericType) && (columnType.GetGenericTypeDefinition() == typeof(Nullable<>)))

{

columnType = columnType.GetGenericArguments()[0];

}

dataTable.Columns.Add(new DataColumn(pi.Name, columnType));

}

}


// Copying the IEnumerable value to DataRow and then added into DataTable.

DataRow dataRow = dataTable.NewRow();

foreach (PropertyInfo pi in tableColumns)

{

dataRow[pi.Name] = pi.GetValue(rec, null) == null ? DBNull.Value : pi.GetValue(rec, null);

}

dataTable.Rows.Add(dataRow);

}

return (dataTable);

}


public delegate object[] CreateRowDelegate<T>(T t);

}

}


See the below sample which fetch all the country with their customers count from Northwind database by using LINQ.
I have created Sample.aspx with one gridview control for displaying the result. See the code below: Sample.aspx

<%@ Page Language="C#" AutoEventWireup="true" CodeBehind="Sample.aspx.cs" Inherits="KannanDotNetReference.Sample" %>

<!DOCTYPE html PUBLIC "-//W3C//DTD XHTML 1.0 Transitional//EN" "http://www.w3.org/TR/xhtml1/DTD/xhtml1-transitional.dtd">

<html xmlns="http://www.w3.org/1999/xhtml" >
<head runat="server">
<title>Kannan Samples : IEnumerabl to DataTable convertor</title>
</head>
<body>
<form id="form1" runat="server">
<div>
<asp:GridView ID="GridView1" runat="server">
</asp:GridView>
</div>
</form>
</body>
</html>

See the sample.aspx.cs code below which fetch the data from Northwind by using LINQ technique. In the code GetCountry() method is using ConvertToDataTable() helper method for converting IEnumerable result to datable. See the complete codeing of Sample.aspx.cs :


using System;

using System.Collections;

using System.Configuration;

using System.Data;

using System.Linq;

using System.Web;

using System.Web.Security;

using System.Web.UI;

using System.Web.UI.HtmlControls;

using System.Web.UI.WebControls;

using System.Web.UI.WebControls.WebParts;

using System.Xml.Linq;

using KannanDotNetReference.HelperClasses;


namespace KannanDotNetReference

{

public partial class Sample : System.Web.UI.Page

{

protected void Page_Load(object sender, EventArgs e)

{

GridView1.DataSource = GetCountry();

GridView1.DataBind();

}


private DataTable GetCountry()

{

var db = new NorthwindDataContext();

var table = db.KannanGetCountry();


DataTable dt = table.ConvertToDataTable(record => new object[] { table });


return dt;

}

}

}


Once we finished our coding part, next run this application. See the result below.


Note:

I have created one stored procedure for fetching the country with number of customers belongs to by using the below code:


CREATE PROCEDURE [dbo].[KannanGetCountry]
AS
SELECT
Country as 'CountryName',
COUNT(CustomerId) as 'CountryCount'
FROM Customers
GROUP BY Country

Happy Coding!!!

Sunday, July 6, 2008

Join Operators in LINQ

Join Operators in LINQ

There are two join operators: Join and GroupJoin. Join and GroupJoin provide an alternative strategy to Select and SelectMany.

1. Join

The Join operator performs an inner join, emitting a flat output sequence. The SQL equivalents of JOIN is INNER JOIN .

For a sample, conside the people and roles objects below and see how to fetch the data from both the objects using JOIN.


List people = new List {
{ ID = 1, LastName = "Kannan", FirstName= "Arjun", RoleId = 1},
{ ID = 2, LastName = "Heema", FirstName ="Sekar", RoleId = 2}
{ ID = 3, LastName = "Seema", FirstName ="Sekar", RoleId = 2}
{ ID = 4, LastName = "Jillary", FirstName ="Sekar", RoleId = 3}
};

List roles = new List {
{ ID = 1, RoleDescription = "Manager" },
{ ID = 2, RoleDescription = "Team Leaeder" },
{ ID = 3, RoleDescription = "Developer" }
};

var query = from p in people
join r in roles on p.RoleId equals r.ID
select new { p.FirstName, p.LastName, r.RoleDescription };

ObjectDumper.Write(query);


The output is
    LastName = Kannan  FirstName = Arjun  RoleDescription = Manager
LastName = Heema FirstName = Sekar RoleDescription = Team Leaeder
LastName = Seema FirstName = Sekar RoleDescription = Team Leaeder
LastName = Jillary FirstName = Sekar RoleDescription = Developer
2. GroupJoin

GroupJoin does the same work as Join, but instead of yielding a flat result, it yields a hierarchical result, grouped by each outer element. It also allows left outer joins. The SQL equivlant are INNER JOIN, LEFT OUTER JOIN .

The comprehension syntax for GroupJoin is the same for Join, but it is followed by the into keyword.

For an example, take the same object initialized above with little changes. Now we will see how to use Group JOIN.

List people = new List {
{ ID = 1, LastName = "Kannan", FirstName= "Arjun", RoleId = 1},
{ ID = 2, LastName = "Heema", FirstName ="Sekar", RoleId = 2}
{ ID = 3, LastName = "Seema", FirstName ="Sekar", RoleId = 2}
{ ID = 4, LastName = "Jillary", FirstName ="Sekar", RoleId = 4}
};

List roles = new List {
{ ID = 1, RoleDescription = "Manager" },
{ ID = 2, RoleDescription = "Team Leaeder" },
{ ID = 3, RoleDescription = "Developer" }
};

var query = from p in people
join r in roles on p.RoleId equals r.ID into pr
from r in pr.DefaultIfEmpty()
select new {
p.FirstName,
p.LastName,
RoleDescription = r == null ? "No Role" : r.RoleDescription
};


The output is
    LastName = Kannan  FirstName = Arjun  RoleDescription = Manager
LastName = Heema FirstName = Sekar RoleDescription = Team Leaeder
LastName = Seema FirstName = Sekar RoleDescription = Team Leaeder
LastName = Jillary FirstName = Sekar RoleDescription = No Role

In the code above, the join … into query expression is used to group the join into a new sequence called pr. Since the new element we introduced in the people sequence has a role identifier that doesn’t correspond to any of Role elements in the roles sequence, an empty element is returned.
In role description, the RoleId 4 is undefined so that the we need to pass 'No Role' as result.

Using the DefaultIfEmpty method, we can replace each empty element with the given ones. In this case no parameter has been provided, so the empty element will be replaced with a null value. By checking this value in the select command we can provide a custom description ("No Role" in our case) when the code encounters null elements.

Note:

  • The advantage of Join and GroupJoin is that they execute efficiently over local in-memory collections because they first load the inner sequence into a keyed lookup, avoiding the need to repeatedly enumerate over every inner element.
  • The disadvantage is that they offer the equivalent of inner and left outer joins only; cross joins and non-equi joins must still be done with Select /SelectMany. With LINQ to SQL queries, Join and GroupJoin offer no real benefits over Select and SelectMany.

Click here to see more operator available in LINQ.

Happy coding!!!

Saturday, July 5, 2008

Projection Operators in LINQ

Projection Operators in LINQ

There are two Projection Operators in LINQ namly 'Select' and 'SelectMany'.

1. Select :

Just like SELECT in SQL, the Select operator specifies which elements are to be retrieved. The record or data retrival based on two models. One is element based selection and another one is Index based selection.

public void KannanLINQDemo() {
int[] digits = { 1, 5, 6, 2, 0 };
string[] strings = { "zero", "one", "two", "three", "four", "five", "six", "seven", "eight", "nine" };


var textNums = from n in digits
select strings[n];

Console.WriteLine("Digit strings:");
foreach (var s in textNums) {
Console.WriteLine(s);
}
}

The output is
           one
five
six
two
zero

Let we see one more sample with different select usage. To select the people whose Role is 2 and their last name starts with the letter 'H' from the following people lists.

List people = new List {               
{ ID = 1, LastName = "Kannan", FirstName= "Arjun", RoleId = 1},
{ ID = 2, LastName = "Heema", FirstName ="Sekar", RoleId = 2}
{ ID = 3, LastName = "Seema", FirstName ="Sekar", RoleId = 2}
{ ID = 4, LastName = "Jillary", FirstName ="Sekar", RoleId = 3}
};
var query = from p in people
where p.RoleId == 2 && p.LastName.StartWith("H")
select p;
ObjectDumper.Write(query);


The output is
    ID = 2, LastName = Heema, FirstName =Sekar, RoleId = 2

2. SelectMany

Transforms each input element, then flattens and concatenates the resultant subsequences . SelectMany concatenates subsequences into a single flat output sequence. SelectMany can be used to expand child sequences, flatten nested collections, and join two collections into a flat output sequence. The SQL equivalents of SelectMany is INNER JOIN, LEFT OUTER JOIN, CROSS JOIN .

For an example, take the above people object and let we take the following roles objects.

List roles = new List {
{ ID = 1, RoleDescription = "Manager" },
{ ID = 2, RoleDescription = "Team Leader" }
{ ID = 3, RoleDescription = "Developer" }

};
To select the first people's Firstname, LastName and their role description from the above objects. The solution is
var query = people
.Where(p => p.ID == 1)
.SelectMany(p => roles
.Where(r => r.ID == p.ID)
.Select(r => new { p.FirstName,
p.LastName,
r.RoleDescription}
)
);
The output is
LastName = Kannan FirstName= Arjun RoleDescription = Manager

Click here to see more operator available in LINQ.

Happy coding!!!

Restriction Operators in LINQ

Restriction Operator in LINQ

There is only one restriction operator in LINQ is 'Where'. One of the most used LINQ operators is Where. It restricts the sequence returned by a query based on a predicate provided as an argument.

The following code snippet uses Where to retrieve every element in a sequence that has FirstName equal to Arjun. In this samples we use Object Initilizer concept to create an people object. We can use this Where in two way.

  1. Element based retrival from the source sequence
  2. Position (index) based retrival from the source sequence
First we will see the element based retrival from the source sequence from the people object given below:


List people = new List {
{ ID = 1, LastName = "Kannan", FirstName= "Arjun", Role = 1},
{ ID = 2, LastName = "Heema", FirstName ="Sekar", Role = 2}
};

var query = from p in people
where p.FirstName == "Sekar"
select p;
ObjectDumper.Write(query);


The index based data retrival from the source squenece is given below the same sample given above. Here, index based retrival using Lamda expression for data fetching.

var query = people
.Where((p, index) => p.Role == index && p.Role = 2);
ObjectDumper.Write(query);


The output for above two samples are same as below.

         ID = 2, LastName = "Heema", FirstName ="Sekar", Role = 2

Click here to see more operator available in LINQ.

Happy coding!!!

Standard Query Operators in LINQ

Standard Query Operators in LINQ

LINQ provides an API known as standard query operators (SQOs) to support the kinds of operations we’re commonly used to in SQL. You’ve already used C#’s select and where keywords, which map to LINQ’s Select and Where SQOs—which, like all SQOs, are actually methods of the System.Query.Sequence static class.

In LINQ many SQOs are avilable whose all are grouped into 14 categories. They are listed below and click the list below to see the more details.
  1. Restriction Operator
  2. Projection Operators
  3. Join Operators
  4. Grouping Operator
  5. Ordering Operators
  6. Aggregate Operators
  7. Partitioning Operators
  8. Concatenation Operator
  9. Element Operators
  10. Generation Operators
  11. Quantifier Operators
  12. Equality Operator
  13. Set Operators
  14. Conversion Operators

Happy Programming!!!

Friday, July 4, 2008

Building blocks and Data sources of LINQ - Part 3

Building blocks and Data sources of LINQ - Part 3

In the last few posts, I coverted few C# 3.0 features namly Object initialization Expressions, Extension Methods and Lamda Expressions and Expression Trees. In this post, I will cover the concept of Anonymous Types and Implicitly Typed Local Variables in details.

5. Anonymous Type

An anonymous type is a type that is declared without an identifer. You can use object initalizers without specifying the class that will be created with the 'new' operator. The compiler creates the anonymous type at compile time and not run time. Anonymous types are particularly useful when querying and transforming/projecting/shaping data with LINQ

let's we take an example of an Employee class with three properties namly Name, Salary and EmpId and see how we declare and instantiate an anonymous type for Employee class,

var employee = new { Name = "Arjun", Salary = 3000.5, EmpId=339 };

At compile time, the compiler creates a new (anonymous) type with properties inferred from the object initializer. Hence, the new type will have the properties Name, Salary and EmpId.

The Get and Set methods, as well as the corresponding private variables to hold these properties, are generated automatically. At run time, an instance of this type is created and the properties of this instance are set to the values specified in the object initializer.

It converts the above code in the background as below


class __Anonymous1
{
private string name ;
private decimal salary;
private int empId;

public string Name{ get { return name; } set { name = value ; } }
public decimal Salary{ get { return salary; } set { salary= value ; } }
public int EmpId{ get { return empId; } set { empId= value ; } }
}

__Anonymous1 employee = new __Anonymous1();
employee .Name = "Arjun";
employee .Salary =3000.5;
employee .EmpId =339;

Let we another sample with multiple Anonymous type declaration.

var Customer = new{
Company = "Photon Company",
Name = "Arjun",
EmpId = 339,
Contacts = new {
Phone = "(044)3141231",
Email = "abc@mail.com" }
};

Notice the Contacts member which is another anonymous type nested inside the first type. Without anonymous types, LINQ would not be able to create types dynamically. This is what allows LINQ to query for an arbitrary set of data, without first having the structure declared.

5. Implicitly Typed Local Variables

A new keyword, 'var', has been added to C#. When the compiler sees it, it implicitly defines the type of the variable based on the type of expression that initializes the variable.

Let we see how its working in the following samples,

var i = 5; // is equivalent to int i = 5;

var s = "this is a string"; // is equivalent to string s = "this is a string";

An implicitly typed local variable must have an initializer. For example, the following declaration is invalid:

var s; // wrong definition, no initializer.

Note :

  • As you can imagine, implicit typing is really useful for complex query results because it eliminates the need to define a custom type for each result.
  • Implicitly typed local variables cannot be used as method parameters.

Happy Coding!!!


Wednesday, July 2, 2008

Building blocks and Data sources of LINQ - Part 2

Building blocks and Data sources of LINQ - Part 2

In the previous post, I coverted two new C# 3.0 features namly Object initialization Expressions and Extension Methods. In this post, I will cover the concept of Lamda Expressions and Expression Trees.

3.Lamda Expressions

This feature simplifies coding delegates and anonymous methods. Lambda expressions allow us to write functions that can be passed as arguments to methods. All lambda expressions use the lambda operator =>, which is read as "goes to".

Lamda Expression can also optionally postpone code generation by creating an expression tree that allows further manipulation before code is actully generated, which happens at execution time.

For an example, we could create a simple Person class. Fetch the person records based start letter in LastName using Lamda Expression.

    public class Person

{

public string FirstName { get; set; }

public string LastName { get; set; }

public int Age { get; set; }

}


public class MyLamdaExpression

{

public List GetPeople(string startLetter)

{

var people = new List

{

new Person {FirstName = "Kannan", LastName = "Arjun", Age = 20},

new Person {FirstName = "Rangoli", LastName = "A", Age = 53},

new Person {FirstName = "Seema", LastName = "Sekar", Age = 15},

new Person {FirstName = "Satya", LastName = "Saravanan", Age = 16}

};


var results = people.Where(p => p.LastName.StartsWith(startLetter));

return (List) results;

}

}


If we call this mehtod like GetPeople("A"), this will return the follwoing outputs:

Arjun
A

For an another example, suppose we have an array with 10 digits in it, and you want to filter for all digits greater than 5. In this case, you can use the Where extension method, passing a lambda expression as an argument to the Where method:

int[] source = new[] { 3, 8, 4, 6, 1, 7, 9, 2, 4, 8 };

foreach (int i in source.Where(x => x > 5))
Console.WriteLine(i);

The advantage of lambda expressions is that they give you the ability to perform expression analysis using expression trees.

4.Expressions Trees

Expression trees are nothing but those which represent the query itself. It is very important to understand that lambda expressions are always directly compiled into IL code by the compiler, so a lambda expression is a representation of a unit of executable code, it is not a data structure. See the picture given below for an easy understands, LINQ can treat lambda expressions as data at run time. The type Expression represents an expression tree that can be evaluated and changed at run time. It is an in-memory hierarchical data representation where each tree node is part of the entire query expression.

There will be nodes representing the conditions, the left and right part of the expression, and so on.

For an example, consider the following very simple lambda expression:

Func<int,int,int> function = (a,b) => a + b;

The variable function points at raw executable code that knows how to add two numbers. The lambda expression shown in above is a short hand way of writing the following method:

public int function(int a, int b)
{
return a + b;
}

One can call either the method shown above, or the lambda expression like this:

int c = function(3, 5);

After the function is called, the variable c will be set equal to 3 + 5, which is 8.

class Program {
static void Main(string[] args) {
Expression<Func> expression = (a, b) => a + b;
Console.WriteLine(expression);
}
}

The delegate type Func shown above in the declaration found is declared for us in the System namespace:

public delegate TResult Func<t1,t2,result>(T1 arg1, T2 arg2);

This code looks complicated, but it is used here to help us declare the variable function, which is set equal to a very simple lambda expression that adds two numbers together. Even if you don't understand delegates and generic functions, it should still be clear that this is a way of declaring a variable that references executable code. In this case it points at very simple executable code.


If you are using the code shown above, set a breakpoint on the WriteLine statement and run the program. Hover your mouse under the variable expression you may seen the expression tree like this,

and ExpressionTreeVisualizer is the new visualization feature avilable in VS 2008.. It can be used to visualize an expression tree.

Translating Code into Data
In the previous section, you saw how to declare a variable that points at raw executable code. Expression trees are not executable code, they are a form of data structure. So how does one translate the raw code found in an expression into an expression tree? How does one translate code into data?

LINQ provides a simple syntax for translating code into a data structure called an expression tree. The first step is to add a using statement to introduce the Linq.Expressions namespace: using System.Linq.Expressions;

Now we can create an expression tree:

Expression<func> expression= (a,b) > a + b;

The identical lambda expression shown in the previous example is converted into an expression tree declared to be of type Expression. The identifier expression is not executable code; it is a data structure called an expression tree.

In the next post we will see the concept of Anonymous Types and Implicitly Typed Local Variables in details.

Happy programming!!!

Building blocks and Data sources of LINQ - Part 1

Building blocks and Data sources of LINQ - Part 1

The LINQ foundation consists of a set of building blocks including query operators, query expressions, and expression trees, which allow the LINQ toolset to be extensible.

You can plug a wide array of data sources into LINQ, including

  • File System
  • Active Directory
  • WMI
  • Windows Event Log
  • Any other Data Source or API

Microsoft already offers more LINQ providers

  • LINQ to Objects is an API that provides methods that represent a set of standard query operators (SQOs) to retrieve data from any object whose class implements the IEnumerable<T> interface. These queries are performed against in-memory data.

  • LINQ to ADO augments SQOs to work against relational data. It is composed of three parts

    • LINQ to SQL : (formerly DLinq) is use to query relational databases such as Microsoft SQL Server.

    • LINQ to DataSet :supports queries by using ADO.NET data sets and data tables.

    • LINQ to Entities : (formerly XLinq) is a Microsoft ORM solution, allowing developers to use Entities to declaratively specify the structure of business objects and use LINQ to query them.

  • LINQ to XML (formerly XLinq) not only augments SQOs but also includes a host of XMLspecific features for XML document creation and queries.

Let we see all the concept given above one by one with an example.

Part 1 : LINQ To Objects

LINQ to Objects can be used with any class that implements the IEnumerable interface. This part will covers the concepts of C# 3.0 new concepts first and then will see how it utilize LINQ,

  1. Object initialization Expressions
  2. Extension Methods
  3. Lamda Expressions
  4. Expression Trees.
  5. Anonymous Types
  6. Implicitly Typed Local Variables

Let’s look at one by one how it works.

1. Object initialization Expressions

Just like an array initializer, an object initialization expression allows us to initialize a new object without calling its constructor and without setting its properties.

           // The standard object creation and initialization
Person p1 = new Person();
p1. FirstName = "Kannan";
p1.LastName = "Arjun";
ObjectDumper.Write(p1);

// The object initialization expression
Person p2 = new Person { FirstName="Kannan", LastName ="Arjun" };
ObjectDumper.Write(p2);


With object initialization expressions you can create an object directly and set its properties using just one statement.

2. Extension Methods

As the name implies, extension methods extend existing .NET types with new methods. Like as obj.ToString(), here ToString() is system function will convert the value as string. In the same way, we can also create our custom function in the name of Extension Method.

For an example 1, by using extension methods with a string, it’s possible to add a new method that converts every space in a string to an underscore(_).

        public static string SpaceToUnderscore(this string source)
{
char[] cArray = source.ToCharArray();
string result = null;
foreach (char c in cArray)
{
if (Char.IsWhiteSpace(c))
result += "_";
else
result += c;
}
return result;
}


Here you define an extension method, SpaceToUnderscore(). To specify an extension method you insert the keyword 'this' before the
first method parameter, which indicates to the compiler the type you want to extend. Note that the method and its class must be static. You can use SpaceToUnderscore() just like any other string method.

Suppose we call this method in the code behinds as given below,

var newstring = "This is kannan test".SpaceToUnderscore() +","+ "Arjun Test".SpaceToUnderscore();

The result of executing this method will return like this,

This_is_kannan_test,Arjun_Test

For an example, to convert a decimal value into string formatted with a specific culture by using extension methods.
In C# 2.0, we can write the custome method for the above case as follows
static class DateFormat
{
public static void Demo()
{
DateTime today = DateTime.Now;
Console.WriteLine(MyLongDateFormat(today));
Console.WriteLine(MyShortDateFormat(today));
}

public static string MyLongDateFormat(DateTime date)
{
return String.Format(date.ToString("U"));
}

public static string MyShortDateFormat(DateTime date)
{
return String.Format(date.ToString("d"));
}
}

After running this sample, we get two different date format as output like this
Thursday, July 03, 2008 1:46:08 AM
7/3/2008

In the above sample we are created two differnet method called MyLongDateFormat() and MyShortDateFormat(). Suppose we need to use this method in some other class, we need to call with full signature.

Now we see how to write the same situation in Extension method.

static class DateFormat
{
public static void Demo()
{
DateTime today = DateTime.Now;
Console.WriteLine(today.MyLongDateFormat());
Console.WriteLine(today.MyShortDateFormat());
}

public static string MyLongDateFormat(this DateTime date)
{
return String.Format(date.ToString("U"));
}

public static string MyShortDateFormat(this DateTime date)
{
return String.Format(date.ToString("d"));
}
}


The output should be the same one what we had in previous sample.


Thursday, July 03, 2008 1:46:08 AM
7/3/2008


Note :

  • Simply by adding the new System.Query namespace, you can use LINQ with any type that implements IEnumerable<t>.
  • If you have an extension method and an instance method with the same signature, priority is given to the instance method.
  • Properties, events, and operators are not extendable

Let we see the rest of the concepts given above in the next post.

    Happy programming!!!

Tuesday, July 1, 2008

How to insert data through stored procedure in LINQ


My last post describes how to create and fetch the data through stored procedure in LINQ. In this post, we will see how to insert the new data to the table, update or modify the existing information and delete the exisiting records through stored procedure in LINQ.

Step 1 : Insert the data via stored procedure.

  1. First we should create DataContext classes for accessing the database. Click here to see how to create DataContext classes. Already, I have created 'KannanBlogDemo' datacontext classes for this demonstration.
  2. Create 'InsertPatientInformation' stored procedure in sql server and drag and drop it into 'KannanBlogDemo.dbml' file.

  1. Once we created our DataContext classes, then add the new .aspx file into the application. For example,
    Insert.aspx
  2. Add one grid view control into the Insert.aspx page.
  3. In the Insert.aspx.cs file, add the following statements under the Page_Load events. In this, first we create an PatientInformation object and assign all the values. Then, call the InsertPatientInformation stored procedure and pass the appropriate value in it. After that, we can fetch all the values including the newly inserted. For a change, we will select the particular fields from PatientInformation objects.
            protected void Page_Load(object sender, EventArgs e)
    {
    var db = new KannanBlogDemoDataContext();
    PatientInformation patientInformation = new PatientInformation();

    patientInformation.LastName = "demo Last Name";
    patientInformation.FirstName = "demo First Name";
    patientInformation.DOB = Convert.ToDateTime("12/12/2000");
    patientInformation.State = "Demo State";
    patientInformation.City = "Demo City";
    patientInformation.MRN = "1234567890";
    patientInformation.FacilityId = 3;
    patientInformation.PrimaryLanguageId = 1;
    patientInformation.Amount = 1000;

    // Call Insert stored procedure.
    db.InsertPatientInformation(patientInformation.LastName, patientInformation.FirstName,
    patientInformation.DOB, patientInformation.City, patientInformation.State,
    patientInformation.FacilityId.ToString(), patientInformation.PrimaryLanguageId,
    patientInformation.MRN, patientInformation.Amount);
    db.SubmitChanges();

    // View all the record with selected fields.
    var patient = db.SelectAllPatinetInformation();
    GridView1.DataSource = from p in patient
    select new
    {
    p.FirstName,
    p.LastName,
    p.FacilityName,
    p.PrimaryLanguageName,
    p.Amount
    };
    GridView1.DataBind();
    }

  4. Here, SubmitChanges() is the method which saves our changes in the DataContext.
  5. Now in Insert.aspx, add alternative row color in gridview. Like as,
           <asp:GridView ID="GridView1" runat="server">
    <AlternatingRowStyle BackColor="#E9E9E9" />
    </asp:GridView>
  6. All the setting are over, now we can run the application and see the result as below.
Happy codings!!!

How to read data using stored procedure in LINQ


  • Step 1 : Create DataContext classes
  1. Create the new project named 'KannanBlogDemo' from Visual studio 2008 under your favirote folder.
  2. Right click the 'KannanBlogDemo' project and select add-->item add.
  3. Select 'LINQ to SQL classes' from Add new item window.
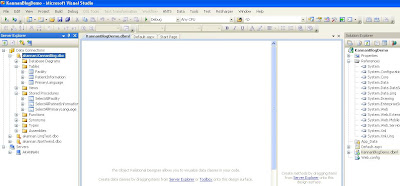
  4. Open Server Explorer and connect your database to be test. For an example, I have created 'KannanBlog' as database with three tables, namely PatientInformation, Facility and PrimaryLanguages. See the below snap for more information.
  5. Once database connected well, then we can see the tables, stored procedures, view and so on which blongs to the database. See the below snap for more information.
  6. Now, drag and drop the tables and stored procedures to be test into the Object Relation Designer. See the below snap for more information.
  7. Once we completed our drag and drops, the system will automatically create DataContext classes for each and every tables along with database name for further references as .dbml files.
  8. Now 'KannanBlogDemoDataContext' is ready to use.
  • Step 2 : Select the record through stored procedure.
  1. Open default.aspx file and add gridview control.
  2. In default.aspx.cs files, page load event add the data fetching coding given below.
    protected void Page_Load(object sender, EventArgs e)
    {
    var db= new KannanBlogDemoDataContext();
    var patient = db.SelectAllPatinetInformation();
    GridView1.DataSource = patient;
    GridView1.DataBind();
    }


  3. Here, 'SelectAllPatientInformation' is the name of the store procedure, which fetch all the patient informations from the database.
  4. Run the application and see the result as below.

    Happy Programming!!!

Saturday, May 3, 2008

An introduction to LINQ

SQL is dead. With the release of Microsoft LINQ to SQL, developers should no longer work directly with ADO.NET or SQL. With simple examples, Stephen Walther shows you how to build database-driven ASP.NET applications by taking advantage of LINQ to SQL. Most of the blood, toil, tears, and sweat that an ASP.NET developer experiences while building a web application is associated with writing the data access code.
Microsoft introduced LINQ to SQL with .NET Framework 3.5 to reduce the work that a developer must perform when accessing a database. LINQ to SQL makes it much easier to write both simple and complex database-driven websites.Writing data access code is difficult because it forces you to bridge two very different universes: the object universe and the relational universe. Your application logic (your C# or Visual
Basic .NET code) inhabits the object universe, whose basic elements are classes and objects. The basic elements of the relational universe, on the other hand, are tables and rows.You interact with the two universes by using two very different languages.
The C# and Visual Basic .NET languages are used for working with objects, and the SQL language is designed for working with tables. If you want to communicate from the object universe to the relational universe, you’re forced to embed SQL strings in your C# or Visual Basic .NET code. These SQL strings are complete gibberish from the point of view of your C# or Visual Basic .NET application. So how do you bridge this divide? LINQ to SQL bridges this divide by enabling a developer to pretend that the relational universe doesn’t exist. LINQ to SQL enables you to write all of your data access code by using C# or Visual Basic .NET. You let C# or Visual Basic .NET worry about how to translate your code into SQL in the background.
Understanding LINQ
LINQ stands for Language Integrated Query. There are many different flavors of LINQ, such as the following:
  • LINQ to Objects
  • LINQ to Amazon
  • LINQ to Entities
  • LINQ over DataSets
  • LINQ to XML
  • LINQ to Flickr
  • LINQ to LDAP
  • LINQ to SQL

These various flavors of LINQ enable you to communicate with different data sources. For example, LINQ to Flickr enables you to perform queries against photos stored at the Flickr website. In this article, we’re concerned with LINQ to SQL, which is the flavor of LINQ that you’ll most likely use when communicating with a Microsoft SQL Server database. (Currently, LINQ to SQL works with Microsoft SQL Server only, and not with other databases such as Oracle or Access.) To use LINQ to SQL, your web project must target .NET Framework 3.5. New websites created with Visual Studio 2008 target .NET Framework 3.5 by default, but you can target an existing application to use .NET Framework 3.5 within Visual Studio:

  1. Right-click the name of your project in the Solution Explorer window.
  2. Select Property Pages.
  3. Click Build.
  4. Select .NET Framework 3.5 from the drop-down Target Framework list (see Figure 1). Behind the scenes, performing this action modifies your web.config file so that it contains references to the right assemblies and uses the correct version of either the C# or Visual Basic .NET language.
    Creating LINQ to SQL Entities Before you can start using LINQ to SQL in your ASP.NET application, you must first create your LINQ to SQL entities. A LINQ to SQL entity is a C# or Visual Basic .NET class that represents an entity from your database. For example, if your database contains a table named Products, you’ll create a LINQ to SQL entity named Product that represents each product from the Products database table.

    The Product class will include a property that corresponds to each column in your database table. Visual Studio 2008 makes it easy to create LINQ to SQL entities. You create LINQ to SQL entities by using the Visual Studio Object Relational Designer (see Figure 2). To create new entities, simply drag database tables from the Server Explorer/Database Explorer window onto the Object Relational Designer.

    Let’s assume that your database contains the following table named Products:
    Column Name Column Type
    Id Int (identity, primary key)
    Name Nvarchar(50)
    Price Money

Follow these steps to create a new LINQ to SQL entity that represents this database table:

  1. From the menu, select Website > Add New Item.
  2. In the Add New Item dialog box, select LINQ to SQL Classes.
  3. In the Name text box, type Store.dbml (see Figure 3).
  4. Click Add.
  5. When a warning message appears, suggesting that the LINQ to SQL classes be added to your App_Code folder, succumb to the suggestion and click Yes.
  6. When the Object Relational Designer appears, drag one or more tables onto the Designer surface from the Server Explorer/Database Explorer. After you drag the Products table onto the Designer surface, you’ll have a new entity named Product. (Visual Studio 2008 changes the name from Products to Product automatically.)
  7. The new Product entity includes a property for each of the columns in the underlying database table. You can view information about each entity property by selecting it and looking in the Properties window. For example, Figure 4 shows the values for the Id property.

Notice that Visual Studio has detected that the Id property represents a primary key and identity value automatically. In the property sheet in Figure 4, both the Primary Key property and the Auto Generated Value property have the value True. If Visual Studio ever gets this setting wrong, you can change these properties manually. For example, I add a column to all of my database tables that has a default value of GetDate(). That way, every time I add a new row to the table, the row gets a date and time stamp automatically. However, the Object Relational Designer doesn’t recognize columns with a default value as being auto-generated. Therefore, I always end up changing the Auto Generated Value property manually for these types of columns.

Behind the scenes, the Object Relational Designer is generating classes that represent the LINQ to SQL entities. You can view these classes by expanding the Store.dbml file and opening the Store.designer.cs or Store.designer.vb file.

Executing LINQ to SQL Queries After you create one or more LINQ to SQL entities by using the Object Relational Designer, you can start performing LINQ to SQL queries. You can write a LINQ to SQL query using either method syntax or query syntax. Let’s start with method syntax. Suppose that you want to retrieve a set of entities representing all of the rows from the Products database table. You can use the code in Listing 1.

Listing 1 Product.cs (method syntax).

using System;
using System.Linq;
using System.Data.Linq;
using System.Collections.Generic;
public partial class Product
{
public IEnumerable<product> Select()
{
StoreDataContext db = new StoreDataContext();
return db.Products;
}
}

The Select() method in Listing 1 returns all of the products from the Products database
table. The method consists of two lines of code. The first line of code instantiates
an instance of the StoreDataContext class. You created the StoreDataContext class
when you created the LINQ to SQL entities. Next, the Products property of this class
is used to return the products.

Notice that Listing 1 contains the definition for a class named Product and that this class is declared as a partial class. The other half of the partial class is contained in the Store.Designer.cs file that’s generated by the Object Relational Designer.

When using LINQ to SQL, you must be careful to import all of the necessary namespaces. You should always import the System.Linq and System.Data.Linq namespaces. If you don’t import these namespaces, the LINQ methods won’t be available.

If you want your data access code to resemble SQL code more closely, you can use query syntax instead of method syntax. The class in Listing 2 does the same thing as the class in Listing 1. However, this new class uses query syntax instead of method syntax.

Listing 2 Product.cs (query syntax).

using System;
using System.Linq;
using System.Data.Linq;
using System.Collections.Generic;
public partial class Product
{
public IEnumerable<product> Select()
{
StoreDataContext db = new StoreDataContext();
return from p in db.Products select p;
}
}

The class in Listing 2 is very similar to the previous class. The only difference
is that this new class uses the expression from p in db.Products select p to retrieve
the products. Whether you use method syntax or query syntax is entirely a matter
of personal preference. There’s no performance difference between the two methods.
If one type of syntax seems more natural to you, use it.
If you want to use either the class in Listing 1 or the class in Listing 2 to display
the products in an ASP.NET page, you can use an ObjectDataSource control to represent
the class. For example, the page in Listing 3 displays all of the products in a
GridView control by binding the GridView to an ObjectDataSource control that represents
the Product class.

Listing 3 ShowProducts.aspx.Listing 3 ShowProducts.aspx.

you view the page in Listing 3 in a web browser, you’ll see the rendered content contained in Figure 5.

It’s important to pause here for a moment in order to notice how simple LINQ to SQL makes accessing database data. You didn’t need to open a database connection or set up a command object. In fact, you didn’t write any ADO.NET or SQL code at all. LINQ to SQL reduced your data access code to its bare essentials.
Think of how much time you could save by taking advantage of LINQ to SQL when writing a database-driven web application!

Creating a Master/Detail Page with LINQ to SQL

The database query examined in the previous section was very simple; we just grabbed all of the rows from the table. But what if you need to perform a more complicated query? For example, how do you filter and order the results of a LINQ to SQL query in the same way as when performing a traditional SQL query? In this section, we’ll create a single-page master/detail form that illustrates how you can both filter and sort the results of a LINQ to SQL query.

  • The first step is to add a new database table to our project. I’m going to assume that the project contains a database table named Categories that looks like this:
    Column Name Column Type
    Id Int (identity, primary key)
    Name Nvarchar(50)
    The Categories table contains product category names such as Beverages, Meat, Cheese, and Other.
  • To create a relationship between the Categories and Products tables, add a new column to the Products table that associates each product with a category. The modified Products table looks like this:
    Column Name Column Type
    Id Int (identity, primary key)
    Name Nvarchar(50)
    Price Money
    CategoryId Int (NULL)
  • Next, we need to re-create the LINQ to SQL entities so that they correctly reflect the modified database objects. Start by opening the Store.dbml file in the Object Relational Designer by double-clicking the Store.dbml file in the Solution Explorer window.
  • Delete the Product entity from the Object Relational Designer so that you can start with a blank slate.
  • Drag both the Products and Categories database tables onto the Object Relational Designer from the Server Explorer/Database Explorer window.

After you complete these steps, the Object Relational Designer displays two entities corresponding to the Products and Categories table (see Figure 6).

Now that we’ve modified the database and updated the entities, we’re ready to write some code to retrieve the categories and products. The code in Listing 4 contains a partial class named Category that includes a method for retrieving all of the categories.
Listing 4 Category.cs.
using System;
using System.Linq;
using System.Data.Linq;
using System.Collections.Generic;
public partial class Category{
public IEnumerable<category> Select() {
StoreDataContext db = new StoreDataContext();
return from c in db.Categories select c;
}
}

There’s nothing new in the Category.cs class. The class contains a method named
Select() that uses LINQ to SQL query syntax to retrieve all of the categories from
the underlying Categories database table. Listing 5 contains a class for retrieving
products. This class contains a method named SelectByCategory() that retrieves products
matching a certain category. The products are returned in order of price.
Listing 5 Product.cs with SelectByCategory method.
    using System;
using System.Linq;
using System.Data.Linq;
using System.Collections.Generic;
public partial class Product{
public IEnumerable SelectByCategory(int categoryId) {
StoreDataContext db = new StoreDataContext();
return from p in db.Products where p.CategoryId == categoryId orderby p.Price select p;
}
}

The LINQ to SQL query in Listing 5 contains from, where, orderby, and select clauses. You should be familiar with these clauses from writing traditional SQL queries. The only weird thing is the order of these clauses. When writing LINQ to SQL queries, you must get used to adding the select clause at the end of the query rather than at the beginning of the query.

Finally, Listing 6 contains an ASP.NET page that takes advantage of both the Category and Product classes. The page displays a drop-down list of categories. When you select a category from the list, any matching products are displayed by a GridView control.

The page in Listing 6 enables you to select a category and display a list of matching products (see Figure 7). In other words, it contains a simple master/detail form.
Inserting Data with LINQ to SQL

In this final section, we’ll examine how you can use LINQ to SQL to modify database data. In this section, you’ll build a page that you can use to insert new records into the Products database table.

When using LINQ to SQL, you insert new records by calling the InsertOnSubmit() method. After calling the InsertOnSubmit() method, you must call SubmitChanges() to make the insertion happen. The SubmitChanges() method executes all of the database commands that have been queued. The modified Product class in Listing 7 illustrates how to write a method that inserts new products into the Products database table.

Listing 7 Product.cs with Insert method.

using System;
using System.Linq;
using System.Data.Linq;
using System.Collections.Generic;
public partial class Product{
public IEnumerable
Select() {
StoreDataContext db = new StoreDataContext();
return from p in db.Products select p;
}
public void Insert(Product newProduct) {
StoreDataContext db = new StoreDataContext();
db.Products.InsertOnSubmit(newProduct);
db.SubmitChanges();
}
}

The ASP.NET page in Listing 8 uses the Product class. The page contains a GridView
control and a FormView control. When you enter a new product with the FormView control,
the product is added to the database and displayed in the GridView (see Figure 8).

Listing 8 ShowInsert.aspx.

        <asp:formview id="Formview1" datasourceid="srcProducts" defaultmode="Insert" runat="server">
<InsertItemTemplate>
<asp:Label ID="lblName" Text="Name:" AssociatedControlID="txtName" runat="server" />
<br />
<asp:TextBox ID="txtName" Text='<%# Bind("Name") %>' runat="server" />
<br />
<br />
<asp:Label ID="lblPrice" Text="Price:" AssociatedControlID="txtPrice" runat="server" />
<br />
<asp:TextBox ID="txtPrice" Text='<%# Bind("Price") %>' runat="server" />
<br />
<br />
<asp:DropDownList ID="ddlCategories" DataSourceID="srcCategories" DataTextField="Name"
DataValueField="Id" AutoPostBack="true" runat="server" />
<asp:ObjectDataSource ID="srcCategories" TypeName="KannanTestApplication.LINQSamples.Category"
SelectMethod="Select" runat="server" />
<asp:Button ID="btnInsert" Text="Insert Product" CommandName="Insert" runat="server" />
</InsertItemTemplate>
</asp:formview>
<asp:gridview id="Gridview1" datasourceid="srcProducts" runat="server" />
<asp:objectdatasource id="srcProducts" typename="KannanTestApplication.LINQSamples.Product"
dataobjecttypename="KannanTestApplication.LINQSamples.Product" selectmethod="Select"
insertmethod="Insert" runat="server" />

To keep things simple, I’ve left out any validation from the page in Listing 8. In real life, at the very least, you would want to associate RequiredFieldValidator controls with both the txtName and txtPrice TextBox controls.
Notice how much code you avoid writing when using LINQ to SQL. You don’t need to get your hands dirty by touching any ADO.NET objects. You never need to set up a database connection or command. All of the low-level plumbing is handled for you in the background by LINQ to SQL.

Conclusion The purpose of this article was to provide a very brief introduction to using LINQ to SQL when building a database-driven ASP.NET application. My hope is that the sample code in this article has convinced you that using LINQ to SQL can dramatically reduce the amount of code you need to write when building
database-driven web applications

Happy Programming!!!

Thursday, January 17, 2008

LINQ : Why need LINQ?

  1. LINQ syntax beats SQL syntax. SQL is flawed in that queries become exponentially difficult to write as their complexity grows. LINQ scales much better in this regard. Once you get used to it, it's hard to go back.
  2. Database queries are easily composable. You can conditionally add an ORDER BY or WHERE predicate without discovering at run-time that a certain string combination generates a syntax error.
  3. More bugs are picked up at compile-time.
  4. Parameterization is automatic and type-safe.
  5. LINQ queries can directly populate an object hierarchy.
  6. LINQ to SQL provides a model for provider independence that might really work.
  7. LINQ significantly cuts plumbing code and clutter. Without sweeping stuff under the carpet, like Workflow or Datasets. This is a credit to the design team.
  8. C# hasn't suffered in the process (in fact, it's gained).

Share your thoughts with me !!!
- Rangoli

Thursday, January 10, 2008

LINQ : Converting an Array of Strings to Integers & Sorting

LINQ is just for queries because it stands for Language Integrated Query. But please don’t think of it only in that context. Normally we use to write a loop to iterate through the array of strings and populate a newly constructed array of integers. But LINQ makes much easier by writing a single line code for the same.

The following example helps us to convert an array of string to integer array with sorted result.

. Declare an array of strings

string[] numbers = { "0042", "010", "9", "27" };

.Convert the array of strings to an array of integer

int[] nums = numbers.Select(s => Int32.Parse(s)).ToArray();

.Sorting the converted array of interger

int[] nums = numbers.Select(s => Int32.Parse(s)).OrderBy(s => s).ToArray();

. To display the resulting array of integers

foreach(int num in nums)
Console.WriteLine(num);

OUTPUT :
9
10
27
42

Share your thoughts with me !!!
- Rangoli